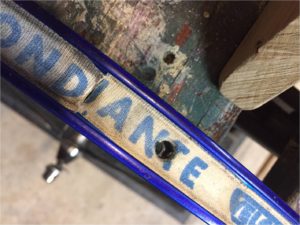
Most clincher rims require the use of some kind of tape to cover the spoke holes and stop the tube from extruding into the void there. For tubeless setups, the rim strip also seals the spoke holes against air loss, of course.
For regular tubed applications, there are lots of different rim tape products to choose from. Some of these are in the form of a thin plastic loop that you stretch over the rim and it snaps into place. Zipp, for instance, includes their own Zipp-branded loop style rim strips with their wheels.
Personally, I like old fashioned cloth adhesive tape like Velox.
Regardless of your choice, proper placement is key to proper function. The strip must be wide enough and centered so that it covers the spoke holes with some excess on each side. For most road rims this means 16 or 17 mm width. Anyway, I’m not gonna write another how-to. Here’s a link to a video. Here’s another. This is so easy that there is no narration in the first video, and the narrator in the second video pads out the run-time with some unrelated activities.
My interests are more, well, esoteric.
A few weeks back, I had a bike in the garage. I pumped up the rear tire. At about 90 psi it suddenly went flat. I took the tire off… checked the tube… found a small split on the inside of the tube about an inch from the valve stem… inspected the rim tape. Whoa!
Rim tape can fail. It can shift side to side, it can age and split. But I’ve never before seen it installed exactly wrong! The amazing thing is that this had been working for over a year!
I don’t care whether you overlap the ends or butt them, just don’t butt them in the middle of a spoke hole, OK!?
